Starting a garden without soil sounds like a futuristic sci-fi project. Yet, thousands of home growers are ditching the dirt every single day. If you want to jump into this world, your journey begins at the absolute square one: germination. Understanding the core principles of hydroponics how to start seeds is the single most critical factor that separates thriving, bountiful indoor farms from costly, moldy failures.
When you plant a seed in traditional soil, you enjoy a safety net. Soil contains natural microbes and buffers that can shield a fragile seedling from minor errors in watering or temperature. In a soil-less environment, that safety net disappears completely. Every variable is entirely in your hands. If you do not learn the precise mechanics of hydroponics how to start seeds, you risk wasting money on premium seeds that simply rot away in your grow media.
Let us fix that right now. This comprehensive guide will walk you through the entire scientific and practical process of starting seeds for your water-based grow system. We will cover the gear you need, the exact steps to take, and the advanced troubleshooting techniques to guarantee a near-perfect germination rate every single time.
Why Traditional Seed Starting Fails in Soil-Less Systems
Many experienced dirt gardeners face major frustration when transitioning to water-based growing. They try to use their old methods, only to watch their investments wither. The reality is that traditional seed starting methods do not translate well to water-based setups.
The Problem with Real Dirt
If you try to germinate seeds in standard potting soil and then transfer them into a soil-less setup, you invite disaster. Dirt clings stubbornly to fragile root hairs. Trying to wash that dirt away before placing the seedling into your reservoir can tear the microscopic root structures.
Even worse, any leftover soil particles can introduce harmful pathogens, bacteria, and fungi into your clean water system. This can clog your pumps, foul your filters, and trigger systemic root rot that can destroy an entire crop in a matter of days.
The Oxygen-Moisture Balance
Seeds need three core elements to wake up from their dormant state: moisture, warmth, and oxygen. In a soil-less setup, the balance between moisture and oxygen is incredibly narrow.
If your starter plugs stay completely saturated without adequate air pockets, the seed literally suffocates and drowns. Conversely, if the medium dries out for even a single hour, the emerging root tip will die, halting the germination process permanently.
Essential Supplies for Hydroponics How to Start Seeds Successfully
Before you drop a single seed into a plug, you must gather the correct equipment. Using the wrong media or low-grade tools will derail your progress before you even begin.
Selecting Your Ideal Starter Media
You cannot use regular dirt, but you have several fantastic soil-less options available. Each medium has unique properties regarding water retention, airflow, and ease of use.
- Rockwool Plugs: Made from melted volcanic rock spun into fine fibers. They hold an incredible amount of water while maintaining great air space. However, they are naturally alkaline and require a pre-soak in acidic water before use.
- Rapid Rooter / Coco Coir Plugs: Formed from organic peat moss or coconut coir bound together with plant-derived polymers. They are incredibly easy to use, hold the perfect air-to-water ratio, and are completely biodegradable.
- Peat Moss Pellets: A classic choice that works well, though they can sometimes break apart if handled too roughly during the transfer phase.
Trays, Domes, and Heat Mats
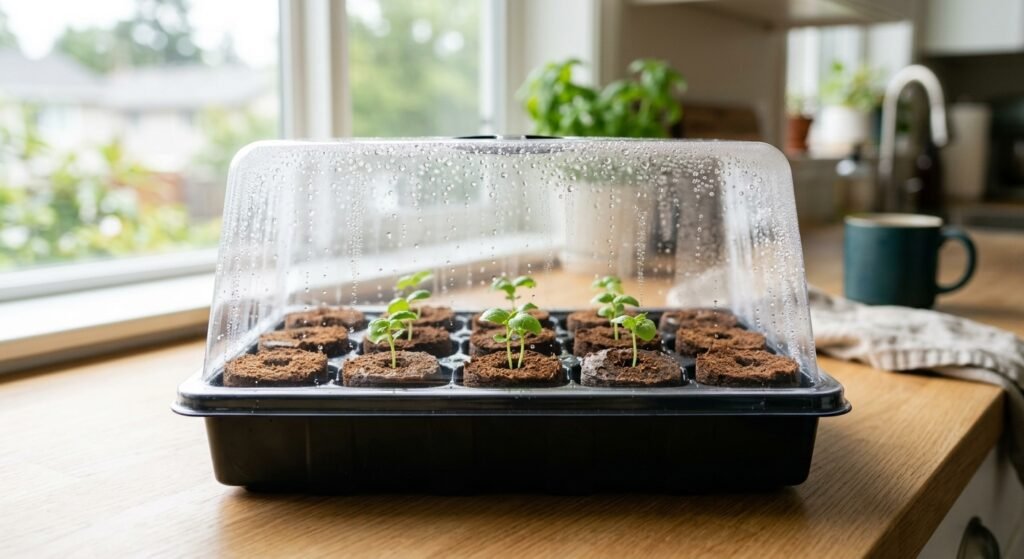
To control the microclimate around your seeds, you need a standard 1020 propagation tray. Pair this with a tall, clear plastic humidity dome. This dome locks in moisture so you do not have to constantly water the fragile plugs.
A heavy-duty seedling heat mat is another non-negotiable tool. Most vegetable and herb seeds germinate best when the root zone stays between 70°F and 80°F. A reliable heat mat ensures stable temperatures, especially if you are starting your seeds in a chilly basement or garage.
7 Steps: Hydroponics How to Start Seeds with Perfect Germination
Follow this exact blueprint to take your seeds from dormant shells to vibrant, root-heavy seedlings ready for your primary reservoir.
1. Prep and Sanitize Everything
Cleanliness is paramount in soil-less cultivation. Wash your propagation trays, domes, and tools with a diluted bleach solution or food-grade hydrogen peroxide. Rinse everything thoroughly with clean water.
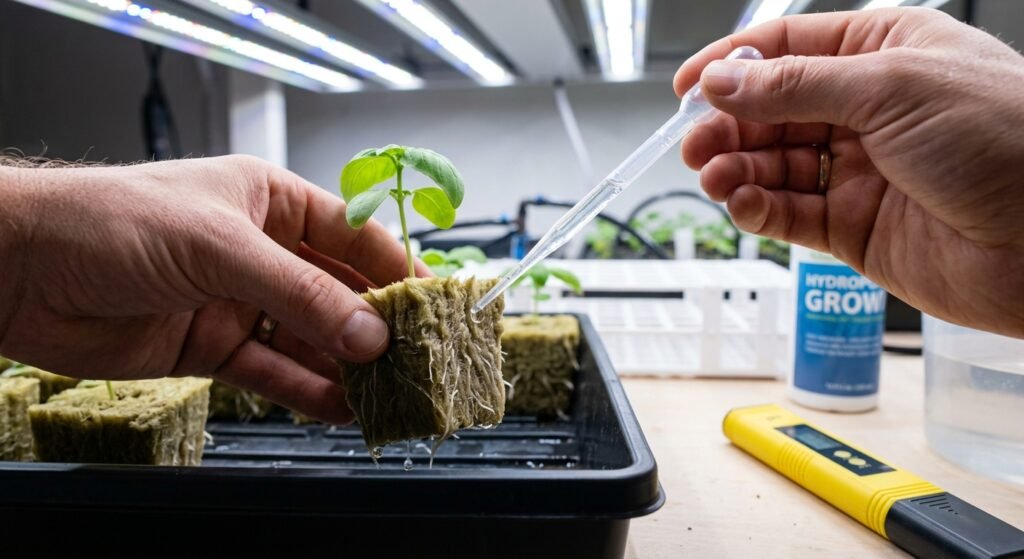
If you are using Rockwool cubes, you must condition them first. Rockwool naturally sits at a high pH of around 7.0 to 8.0. Soak your cubes in water adjusted to a pH of 5.5 for at least an hour to stabilize the medium for your seeds.
2. Hydrate Your Chosen Growth Media
For coco coir or Rapid Rooter plugs, soak them in pure, un-chlorinated water at room temperature. You want the plugs to be thoroughly wet but not swimming in a puddle.
Pick up a plug and give it a very gentle squeeze. It should feel like a wrung-out sponge. If it is dripping wet, let the excess water drain out of the tray before moving forward.
3. Plant Your Seeds at the Correct Depth
Drop one to two seeds into the pre-made hole of each starter plug. A common rookie mistake is burying the seed much too deep into the medium.
The general rule of thumb is to plant the seed at a depth equal to twice its width. For tiny seeds like lettuce, this means barely pushing them below the surface. Gently pinch the top of the plug material over the hole to shield the seed from direct light.
4. Optimize the Humidity Dome and Heat Mat Setup
Place your populated plugs inside the propagation tray. Put the clear humidity dome over the top and close any adjustable vents to trap the moisture.
Set the entire tray directly onto your seedling heat mat. Place the setup in a warm room away from direct sunlight or cold drafts. At this stage, the seeds do not need any light; they simply need consistent, gentle warmth and high humidity.
5. Monitor Daily for the First Signs of Life
Check your tray twice a day. Look for the first tiny green loops pushing through the top of the plugs. Wipe away any excessive condensation from the inside of the dome if it looks like it is dripping directly onto the seeds.
If the plugs begin to look dry or feel light, do not pour water over the top. Instead, pour a small amount of pH-balanced water into the bottom of the tray. The plugs will naturally wick up the moisture from below.
6. Introduce Gentle Lighting Immediately After Sprouting
The moment the first green leaves appear, remove the tray from the heat mat and introduce a light source. If you delay this step, the seedlings will stretch out rapidly, becoming weak, spindly, and useless.
Position a gentle T5 fluorescent light or a dimmable LED grow light roughly 4 to 6 inches above the dome. Keep the lights on a timer set for 14 to 16 hours of light per day to encourage short, stocky, and robust growth.
7. Harden Off and Propagate Root Development
As the seedlings grow their first set of true leaves, slowly crack open the vents on your humidity dome over two days. This slowly acclimates the plants to the lower humidity of your room.
Eventually, remove the dome entirely. Check the bottom of the plugs daily. Once you see bright white roots bursting through the bottom and sides of the plug, your plants are officially ready for transplanting.
Managing Water and pH: The Unseen Germination Killers
Water quality is the foundation of successful soil-less growing. You cannot simply use straight tap water and expect elite results when learning hydroponics how to start seeds.
The Danger of Hard Water and Chlorine
Municipal tap water often contains high levels of chlorine, chloramine, and heavy minerals like calcium and magnesium. These chemical additives can easily burn the sensitive, microscopic root hairs of a newly sprouted seed.
Always use filtered water, reverse osmosis water, or at least let your tap water sit out in an open bucket for 24 hours to allow the chlorine gas to dissipate naturally before using it on your crops.
Dialing in the Exact pH Range
Plants grown without soil cannot access nutrients properly if the water is too acidic or too alkaline. For the vast majority of crops, you must keep your water pH strictly between 5.5 and 6.5.
Invest in a reliable digital pH pen and a bottle of pH Up and pH Down adjustment solutions. Check the pH of your water every single time you moisten your starter plugs. Even a brief spike in pH can lock out essential minerals and stunt your seedlings permanently.
| Growth Stage | Ideal Water Type | Target pH Range | Nutrient Strength (PPM) |
| Day 1-3 (Germination) | Pure RO or Filtered Water | 5.5 – 5.8 | 0 (No Nutrients) |
| Day 4-7 (Sprout) | Pure RO or Filtered Water | 5.8 – 6.0 | 0 (No Nutrients) |
| Day 8-14 (First True Leaves) | Lightly Buffered Water | 5.8 – 6.2 | 200 – 300 PPM |
| Day 15+ (Transplant Ready) | Standard Reservoir Mix | 5.5 – 6.5 | 500 – 800 PPM |
When and How to Introduce Nutrients to New Seedlings
A seed is a self-contained biological miracle. It packs its own internal supply of carbohydrates, proteins, and minerals designed to fuel its life through the early stages of growth.
Keep the Fertilizer Away Early On
Do not add any liquid nutrients to your water during the first week of life. Introducing fertilizer too early will cause severe nutrient burn, curling the leaves and killing the root structure.
Pure, clean water is all your seeds want until they successfully develop their very first pair of true leaves. True leaves look distinctly different from the initial, rounded seed leaves.
Mixing Your First Micro-Dose Nutrient Solution
Once those true leaves emerge, the plant’s internal food supply is spent. It is now ready to feed from external sources. Mix a highly diluted batch of high-quality, water-soluble hydroponic nutrients.
Aim for roughly one-quarter strength of what the manufacturer recommends for mature plants. Keep the total dissolved solids low, around 200 to 300 parts per million. Always verify the pH after mixing your nutrients, as fertilizers naturally alter water chemistry.
Lighting Strategies: From Darkness to Full Sprout
Managing your lighting cycle correctly during the early days is a delicate balancing act that requires close attention.
The Darkness Phase
During the initial days inside the plug, your seeds require absolute darkness to trigger their internal biological wake-up call. Keep your grow lights completely turned off.
If your propagation tray sits in a room that gets bright daytime sunlight, throw a dark towel or an extra inverted solid tray over the humidity dome to keep the interior completely dark.
Choosing the Right Light Spectrum
When the seeds break through the surface, they need high-intensity light that mimics the blue-shifted spectrum of natural spring sunshine. Blue light wavelengths encourage tight node spacing and strong, thick stems.
Avoid using cheap incandescent bulbs, which throw off far too much heat and lack the correct light spectrum. Stick to dedicated LED grow panels or classic T5 fluorescent fixtures designed specifically for plant propagation.
Transplanting Your Rooted Plugs into Your Main System
Seeing thick, fuzzy white roots emerging from your plugs means you have successfully crossed the finish line of the germination phase. Now, you must execute the transfer cleanly.
Prepping the Main System Net Pots
Whether you operate a Deep Water Culture system, a Nutrient Film Technique setup, or an Ebb and Flow table, the process remains similar. Clean your clay pebbles or expanded clay grow media thoroughly to remove any residual dust.
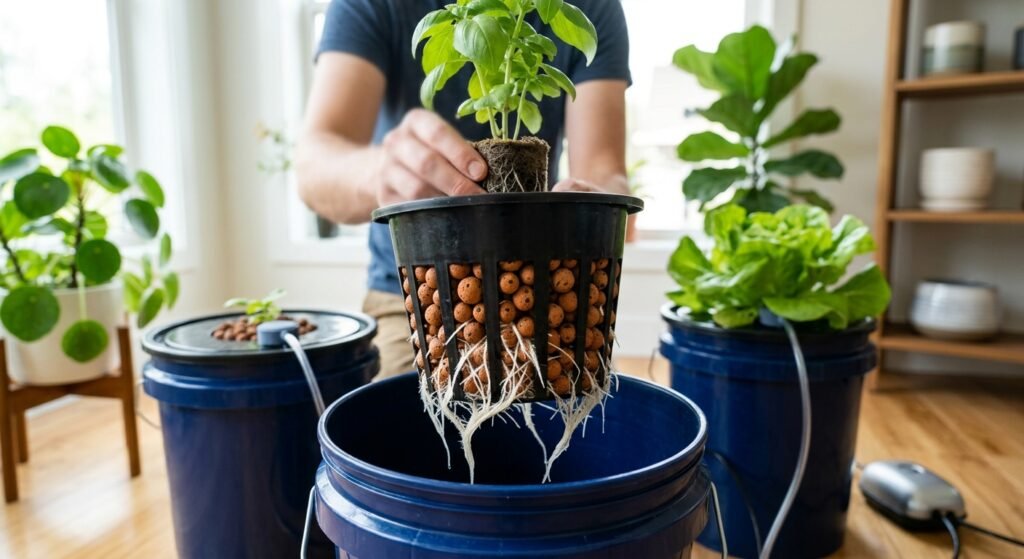
Fill the bottom third of your plastic net pots with a layer of clean clay pebbles to create a stable foundation.
Positioning the Starter Plug
Gently lift your rooted starter plug from the propagation tray, handling it solely by the edges of the media. Avoid touching or pulling on the delicate exposed roots.
Place the plug directly into the center of the net pot. Carefully fill in the remaining space around the sides of the plug with more clay pebbles until the plug is completely secure and shielded from direct light.
Adjusting the Water Level
When you first place the net pots into your main reservoir system, the water level must be set correctly. The nutrient solution should sit roughly one inch below the bottom of the net pot.
The bubbles from your air stones will pop at the surface, creating a gentle mist that keeps the bottom of your clay pebbles and starter plugs perfectly moist. This forces the root system to stretch downward into the deep water reservoir in search of moisture.
Advanced Troubleshooting: Solving Common Seedling Crises
Even with the best gear, biological systems can occasionally run into roadblocks. Recognizing the early warning signs of trouble will save your garden from total ruin.
The Dreaded Damping Off Disease
If your seedlings look completely healthy one morning, but by evening they have collapsed at the soil line and died, you are dealing with damping off. This fatal condition is caused by airborne fungi that thrive in cold, stagnant, and overly wet conditions.
Prevent this by ensuring excellent air circulation. Place a tiny, low-powered oscillating fan near your propagation tray to keep a gentle breeze moving across the dome. Never allow the starter plugs to sit in stagnant standing water for extended periods.
Yellowing Leaves and Stunted Growth
If your new leaves are turning a pale yellow color, your plants are likely suffering from either an improper pH level or a distinct lack of nutrients. Check your water pH immediately.
If the pH sits perfectly within the 5.5 to 6.5 range, your seedling has likely consumed its internal seed energy and is starving for food. Introduce a weak, quarter-strength nutrient solution to kickstart their growth.
Algae Growth on Top of Plugs
Algae requires two things to thrive: moisture and direct light. Because your starter plugs stay consistently wet under bright grow lights, green algae can easily form on the top surface of the media.
While a tiny bit of algae is harmless, a thick layer will steal oxygen and nutrients from your plant’s roots. Prevent this by placing specialized paper covers or a thin layer of clay pebbles over the top exposed surface of your starter plugs to completely block the light.
FAQ
How long does it typically take to learn hydroponics how to start seeds and see sprouts?
Most common vegetable and herb seeds like lettuce, basil, and tomatoes will sprout within 3 to 7 days when kept in optimal conditions. Hardier, thicker seeds like peppers or rosemary can sometimes take up to two full weeks to break through the surface. Maintaining a stable temperature between 75°F and 80°F on a heat mat will significantly speed up this timeline.
Can I use regular tap water when mastering hydroponics how to start seeds?
It is highly recommended to avoid straight tap water for the germination phase. The chlorine and heavy chemical treatments used by cities can burn fragile root cells. Always opt for reverse osmosis water, distilled water, or filtered rainwater. If you must use tap water, let it sit out in an open bucket for 24 hours to let the gases dissipate.
Why are my seedlings growing so tall, thin, and spindly?
Spindly growth is a textbook sign of light starvation. When a seed breaks through the surface and cannot find an adequate light source, it rapidly stretches its stem upward in a desperate attempt to find sunshine. Move your grow lights significantly closer to the plants, or increase the intensity of your grow fixture immediately to correct this issue.
Do I need to use an air pump inside my seed propagation tray?
No, you do not need an active air pump or air stones inside your initial propagation tray. Because the starter plugs are exposed directly to the open air inside the humidity dome, the roots get plenty of oxygen. You only need active aeration when you transfer the rooted plugs into a deep water culture reservoir system.
Should I keep my grow lights turned on 24 hours a day for new seedlings?
While some growers keep lights on continuously, it is generally best to give your plants a natural rest period. A schedule of 16 hours of light and 8 hours of absolute darkness works beautifully. This natural cycle allows the young seedlings to focus on vital root development and respiration during the dark phase.
How do I know exactly when a seedling is ready to move to the main reservoir?
Your plants are ready for transplanting when you see multiple bright white roots extending out of the bottom and sides of the plug, and the plant has developed its first full set of true leaves. This transition usually occurs around 10 to 14 days after the seed initially sprouts.
Elevating Your Soil-Less Garden Starting Today
Mastering the foundational principles of hydroponics how to start seeds is a definitive rite of passage for any indoor grower. By shifting away from unpredictable dirt and taking total control over your microclimate, moisture levels, and water chemistry, you give your plants the absolute best start in life. Be patient, invest in clean tools, keep a sharp eye on your daily pH levels, and you will soon enjoy a constant supply of vibrant, fast-growing crops all year round.
2 thoughts on “7 Easy Steps to Master Hydroponics How to Start Seeds for Flawless Grows”